8th Grade Math Teacher
  • HOME
  • TPT Store
  • Join my Email List
  • Contact Me
8th Grade Math Teacher
Banner
  • HOME
  • TPT Store
  • Join my Email List
  • Contact Me
Tag:

classroom organization

FreeOrganizationTeacher Hacks

Inexpensive Classroom Organization

by Jennie Webb July 23, 2019
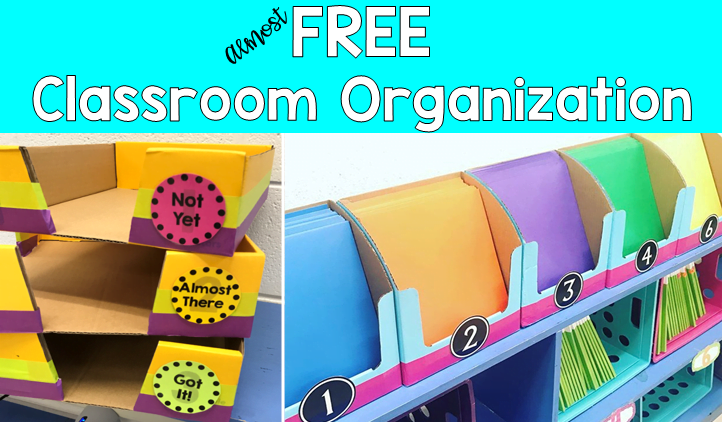
Whether you’re a new teacher or a teacher looking for some help with organization, you probably don’t want to have to spend a lot. Here is a solution I’ve used that is almost FREE.

At back-to-school time, the shelves of many stores are packed with school supplies. The boxes used to hold all of the shiny new items are perfect for storage in your classroom! You just simply need to ask. I often go to Walmart or Staples the weekend or two before school starts and that’s when you find a lot of those boxes empty. I always need to buy something anyway, so I grab a couple empty boxes and ask if I can have them. I reinforce them/ decorate them with some tape, add some labels, and I’m done- cheap storage for my classroom!

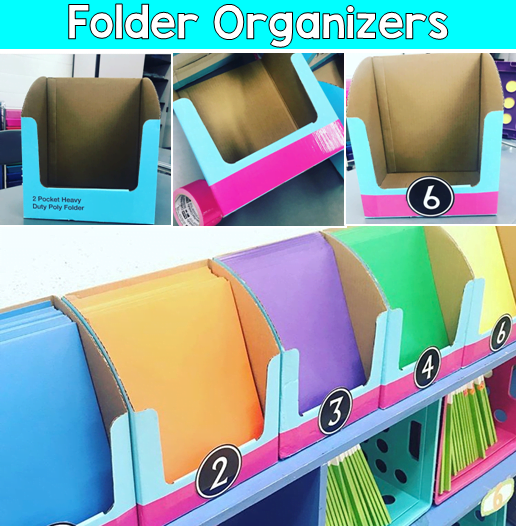
Folder/Notebook boxes. For these, you will need to get boxes used to display folders. You can get notebook boxes, but they aren’t wide enough for folders and they may not hold enough notebooks for the number that you need. The ones pictured are from Staples and I used Duck Tape to wrap around the bottom. This was to cover the writing on the box and to give the box a little more support. I have a different box for each class period, so I added a number label on the front of each one. That’s it! You can, of course, use other types of tape to decorate or none at all if your label covers the writing on the box.

I’ve used these for differentiation (leveled student work in folders) but you could use them to store Interactive Notebooks in your classroom. Currently, I have students keep their “I Can” Checklists and formative assessments in their folders. Each time they get something back, they update their checklist and staple the learning check to the back of the checklist. I have one for each unit so by the end of the year, the folder is full of all the things they have learned.

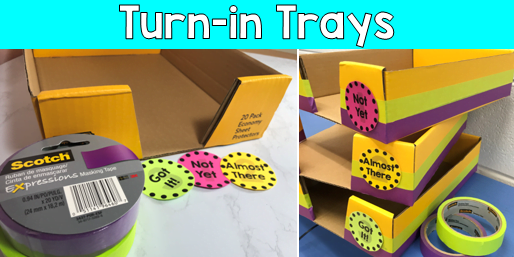
Turn-in Trays. These boxes can be found empty a lot because they are used to sell paper, dividers, sheet protectors, and other things. Follow the same instructions as before- wrap with tape and label. For these, I got the boxes from Walmart and wrapped them with masking tape. I put a post-it on top of the writing before wrapping because it showed through the lighter green color. For my turn-in trays, I wanted students to self-asses their work, so I made 3 and added these FREE Mastery Level Labels. You could also label yours by class period or however will help you to sort papers.

For a video showing how to make the turn-in trays, check out my Instagram stories Organization highlight.

Stay organized and do it without spending a lot of money! Let me know where you get your boxes and how they turn out!

July 23, 2019 0 comment
0 FacebookTwitterPinterestEmail
CalculatorsClassroom ManagementMath Resources

How to Manage Your Calculators

by Jennie Webb July 18, 2018

In the new school year, everything is shiny and bright. The floors glisten with a fresh coat of wax and the marker bins are full of bright colors. Everything is in its place.

By the end of the year, you consider it a win if the first dry-erase marker you try works.

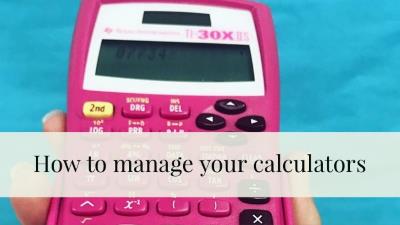
Markers get used, pencils break, and paper gets tossed. But one thing that you won’t get a new supply of year after year is calculators. Without proper management, calculators often get lost, marked on, or broken. You and your school most likely can’t afford to replace them, so here a few tips to help you still have all of your calculators at the end of the year.

  1. Number each calculator. Clearly label each calculator. Permanent marker is best (because who can resist peeling or scratching off a sticker?) You might want to put your name or team name on them too.
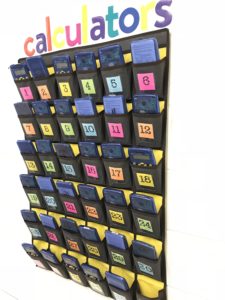
  2. Have a consistent storage method. Decide where calculators will be stored. It could be their boxes, a calculator caddy or pocket chart, a shoe organizer, or some other location. I use a pocket chart from Amazon that I got for $15. It came with cards, but I printed the numbers on colored paper to brighten it up. Whatever storage method you choose, just make sure it is numbered.
  3. Use a sign-up sheet. Make copies of a sign-up sheet (one for each class you have). I usually use colored paper and put them on a clipboard that is accessible to students during class. Have students sign up for a calculator number and tell them that they will use that same number all year long. I let my students pick any number they want because they will remember it better. But if they forget it, they can always look back at the sign-up sheet.
  4. Give Expectations. Give students clear expectations about how to get their calculators each class, how to use them, and how to return them. For example, I explain to my students they will take a “one-way street” at the beginning of class and pick them up before going to their seat. I tell them to know where their calculator is at all times so it won’t be knocked off their desk. I make sure they know not to write on it and report to me if it’s missing or something is wrong with it. It is important that they also know to return them in the correct place at the end of every class. I set a silent timer 2 minutes before class ends to make sure they have time to properly put everything away. I ask them to not put up calculators for friends because that’s when they tend to end up in the wrong spot. Whatever you want them to do, tell them!
  5. Enforce expectations. Enforce what you say! I don’t let the class leave until every calculator is put back. I remind them of my expectations as needed and they quickly learn that it is just part of our classroom routine. I’m not sure how many times I had to say early on, “We’re still waiting on calculator number…” A little pressure from classmates helps. If something is wrong with a calculator, I track down the student who had it the class before and ask them about it. When students know it is important to you, they will treat materials more respectfully.

Bonus Tip: Keep a stash of little alcohol wipes to clean and disinfect your calculators throughout the year.

What other tips do you have to share? Leave a comment and let me know!

I hope this helps your classroom! Check out more Back-To-School ideas from my friends!

Set High Expectations on Day One

Day 1- Get them Engaged

How to Create Meaningful Anchor Charts to Decorate your Classroom with a Purpose

20 Things To Do Before the New School Year

Managing Lab Supplies

Wake up! Thinking Outside the Box on Day One

An Interior Designer’s Guide to Classroom Design

Tips for Setting Up your Math Classroom

July 18, 2018 4 comments
0 FacebookTwitterPinterestEmail

About Me

About Me

Hi! I'm Jennie. I live in Kentucky with my husband and two daughters. I have been teaching middle school math for 15 years. I love helping other math teachers by sharing ideas and resources!

Drop Me A Line

Recent Posts

  • Teaching Systems of Equations Word Problems

    December 27, 2020
  • Mother’s Day Activity for Middle School Math

    April 28, 2020
  • March MATHness

    March 9, 2020
  • 6th, 7th, and 8th Grade Middle School Math Halloween Activities

    September 14, 2019
  • Inexpensive Classroom Organization

    July 23, 2019

Categories

  • Calculators (1)
  • Classroom Management (2)
  • Fitbit (1)
  • Free (1)
  • Halloween (1)
  • March MATHness (1)
  • Math Activity (3)
  • Math Games (2)
  • Math Resources (4)
  • Mother's Day (1)
  • Open Up Resources (1)
  • Organization (1)
  • Systems of Equations (1)
  • Teacher Hacks (2)
  • Time Management (1)
  • Facebook
  • Instagram
  • Pinterest

@2018 - 8th Grade Math Teacher. All Right Reserved. Site by CrowdSouth


Back To Top